Deciding to Practice and Start Small
First mini one(July of 2022). It could be a doll or pet quilt or etc…
I’m glad for the switch up to start smaller instead of making a big mistake on the 3rd Cousin Quilt.
For some reason the quilting foot has stopped twice now and it just keeps stitching in the same place, so, I end up cutting multiple strands under my quilt and rethreading the lower bobbin. Maybe it’s the thread or tension?
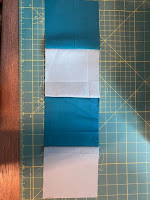
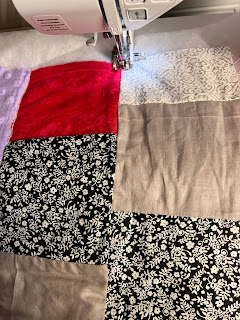
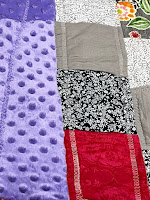
I used basting spray to sandwich the back and front panel and also pinned it.
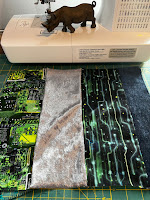
🦏 This is Quilting…
First turn off the machine and raise the presser foot lever.
On my Brother SQ9185, there is a stainless piece behind the needle with a black push in piece. That is the Presser Foot holder. Pressing it drops the foot from the machine. I also remove the Presser Foot holder by using the flat round tool that came with the machine, or a flat screwdriver works better to loosen the screw. The Presser Foot holder will drop off and enable me to add the Walking Foot SA140 (F033N: XC2214-052). This foot is not the same I use but it is compatible.
The Brother book states only to use the walking foot with straight or zigzag stitches. However, I have made longer curves with it.
Add the foot by lining up the little bar on the Walking Foot with the shank on the machine and line up the little arm with the needle bar that is higher to the right. The Operation Manual should help you understand as well.
Thread the machine upper and lower bobbin.
I just follow my shapes and lines while sewing. Easily change sewing direction by raising the presser foot lever. Turn if you just need to change direction and then lower the presser foot lever and continue.
If you need to move areas, raise the presser foot lever and the needle. Move to where you need to stitch, drop the needle and presser foot lever. You will need to cut the thread from the last stich because it will follow you and bunch up.

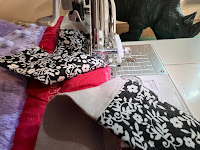
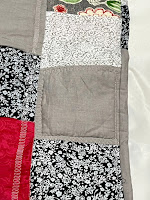
After stitching the quilt, I’m still using the Walking Foot, and add the Binding. You can make or buy the binding. I like to make it continuous. I start on the back in the middle of a side leaving a piece about 4 to 6 inches long (cut, tuck, and sew later). There are different ways to sew corners. Watch some videos and practice different ways or create your own. There is no wrong way as long as it looks complete.
I cannot wait to finish the larger one. I’ve been able to increase the stitch speed the more I sew. It can be tough if the fabric is thicker, then I slow down a bit.
Quilting already seems time consuming and that seems to be something I don’t have a lot of. However, I do really enjoy it.

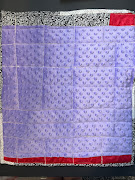
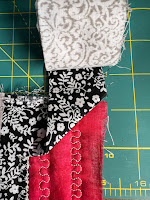
So, I consider this Imperfect Art. It’s 20 x 23 inches.

I purchased some black and grey multi purpose thread and am going to try stitching the Rhino and text for the trial quilt.
Let’s see how it turns out.
Well, I wish my machine had a usb to be able to upload embroidery stitches.
Okay, so I couldn’t stitch the Rhino as of yet. So, I signed the 1st, 23 inch with a Pentel Gel Roller Pen for Fabric in black. I had to order it online because it wasn’t found in a store near me. I read on a quilting website not to use a Sharpie, after I ordered a six pack.