Brother Sewing Machine Model: SQ9185
This is my 1st Sewing Machine. My husband gave it to me as a Gift quite a few years back. It took me a few years to even take it out of the box. My time is limited because I work full time and we travel. I finally decided I was going to get started. I read through the manual a little bit 1st and also watched a few video’s online to get an idea of my options to start. Keep your manual nearby as it is a great tool to reference for sewing feet, stitch length, stitch design, thread tension or tightness, etc…
I should be a wiz at sewing because my Grandmother Wasser and Aunt Betty Wasser were both seamstress’. I was a little nervous to start.
How to thread a sewing machine
1st, thread a few of the small bobbins on the top. This will need to be placed under the little plastic tab close to under the needle of the machine.
Ist I follow the diagram atop my SQ9185 to thread my small bobbin keeping my thread strand tight. 2nd, I wrap thread clockwise around bobbin 8 to 10 times making sure the thread is tight. 3rd, I place/slide down the small bobbin on the little stem towards the right top of the machine. 4th, holding the end of the thread length that I just wrapped, slide the little stem to the right where I see the little bumper. 4th, use the presser foot making sure the machine is set to the slowest speed and the presser foot is down. Make sure the end you are holding wraps around the bobbin and not beneath the holder because it will wad up under there and cause problems later.
I also follow the diagram in the operating manual for going around hooks (mine has 3 from the thread to the little bobbin) keep the thread a little tight and wrap around the little bobbin leaving extra on the end. Hold, place on the top short post with the little stopper and slide to the right to the little bumper stop.
Next, use your presser foot to begin winding the bobbin. I prefer the steel bobbins to plastic thus far.
I realize after watching a video and reading a section of the manual, I need to use thread from the top and also the bottom bobbin in order for the needle to sew.
There is a little track like a half circle above the bottom bobbin compartment on the base of my machine. Make sure the thread comes off the bobbin facing you, place the small bobbin in the round spot, follow the small dip or track, and pull the thread around the half circle. Mine is towards the front of the machine.
Next, you will thread the top of the machine. Your book should have a diagram for you to follow. I just followed the steps of the numbers on my machine. I learned that this one has a self threading mechanism for the needle. It did take me a minute to learn it.
I was totally overthinking it. I’m Sew New at this!
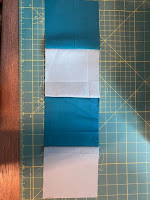
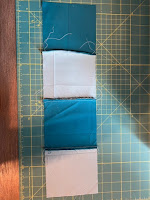
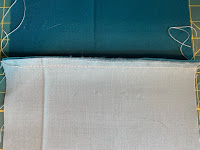
I start with a regular stitch and low speed with two rough cut squares of trial fabric a quilt store gave me with purchase of some sewing tools. Place the squares with the good side facing each other and sew together on the outer edge with a 1/4 inch seam allowance like sew. The plate on my machine has measurements for a seam allowance.
It’s sew easy once your foot presses down on the pedal. after I made a few strips of four squares together, I moved the arrow slider to medium speed >>.
I take my time with an Idea regarding the project.
Making or Sewing is Trial and Error Learning.
I begin with drawing an image or sketch of my idea. Sort of like a pattern. Keep it simple in the beginning.
If you don’t like it, make something else.
I read once you create a pattern, it belongs to you.

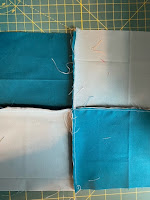
You can sew do this! The above squares weren’t exactly even but it’s better to try with scraps or fabric you don’t need for a project.
If you have any questions feel free to ask. I will answer to the best of my knowledge.
The Right Presser Sewing Foot
There are 2 parts to add or remove for a Presser Sewing Foot. One is the stainless rectangle (back has black press in to remove it) with the small arch that gets lowered on to a foot with the presser foot bar or the right side wheel which is always turned towards you. Doing the opposite turn can cause major problems with the machine.
I use the manual to determine which foot I might need for a particular design or stitch. I always practice on scrap before beginning.
You May Also Like
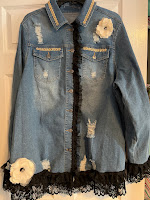
Denim Shirt Jacket Project
A 3rd Cousin Quilt 2022 #1